Connecting Pro mics to your consumer camcorder
The problem
Many camcorder users, quite rightly, wish to improve their sound quality and an obvious way to do that is to use an external microphone rather than the inbuilt ones on the camcorder.
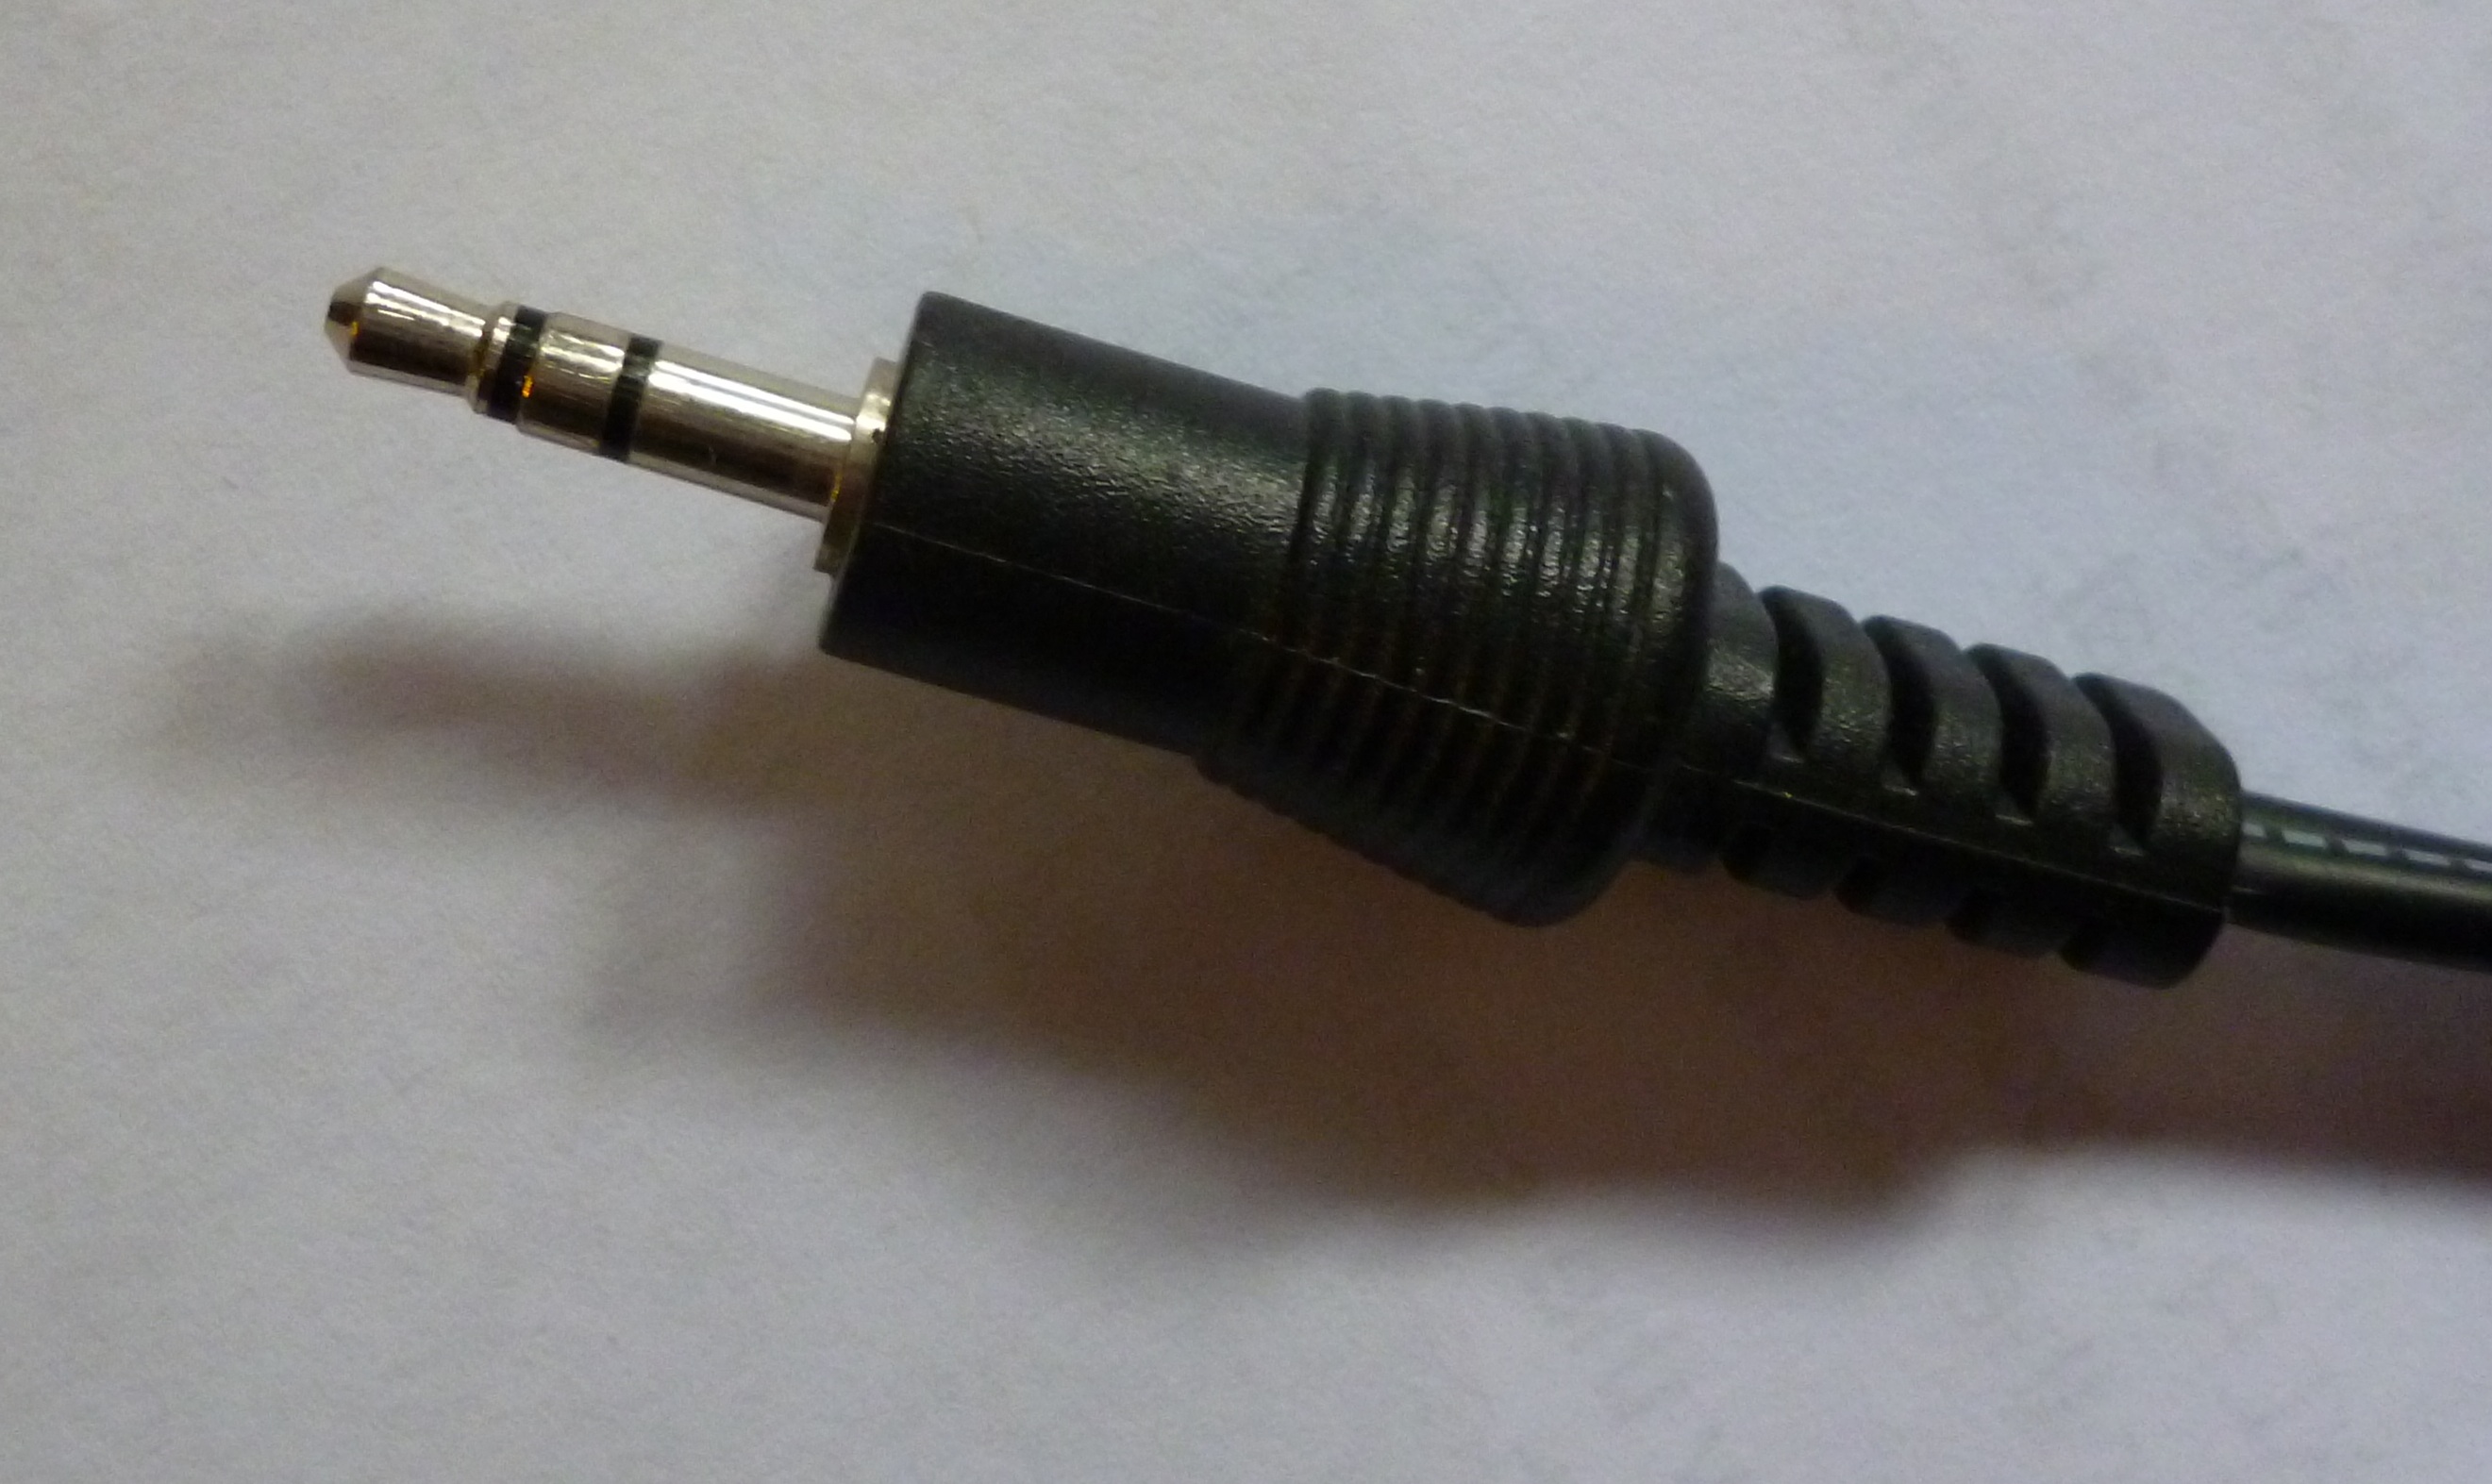
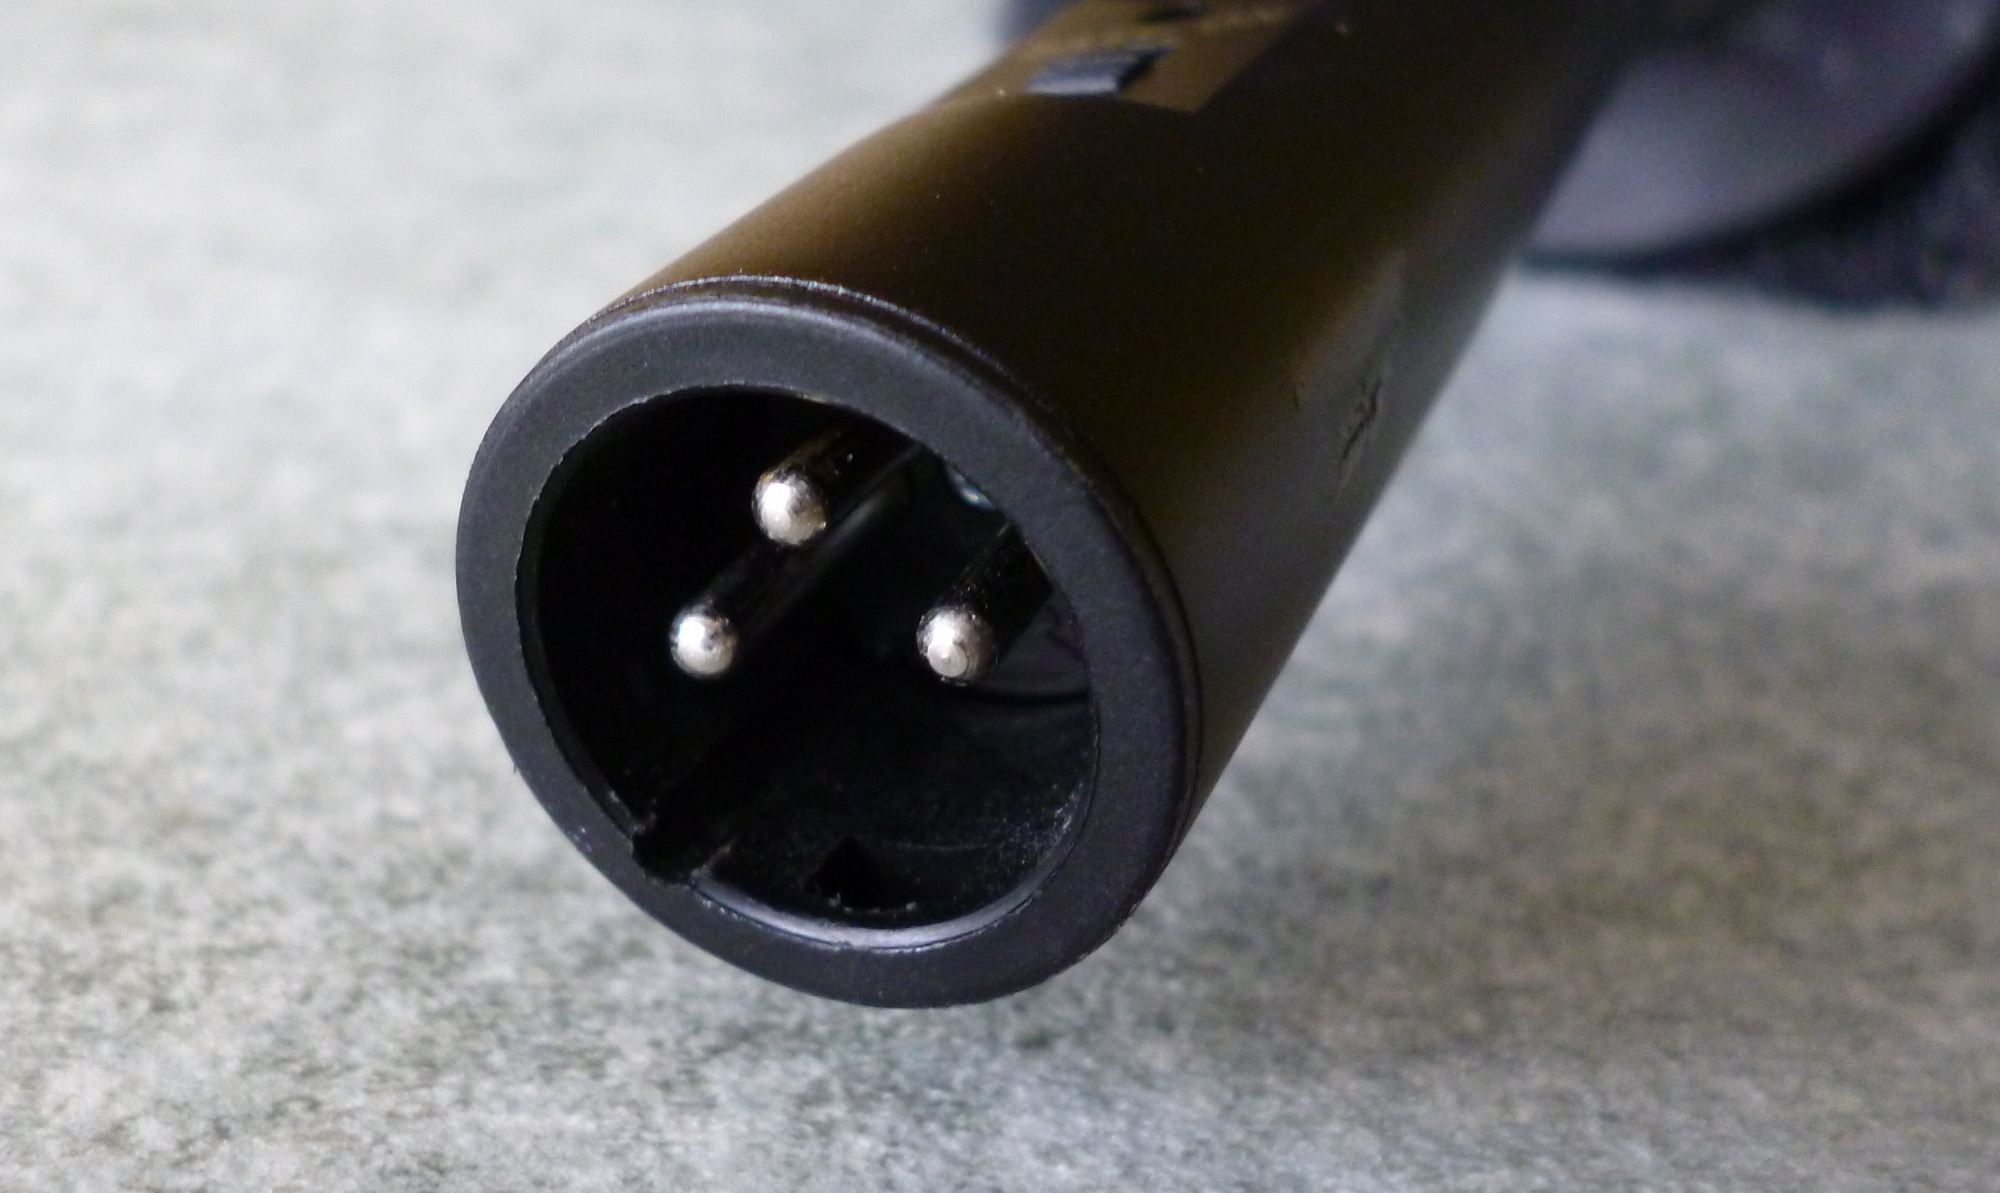
But whereas consumer camcorders boast a 3.5 mm stereo socket to plug in external microphones (if indeed they have a socket at all), professional microphones almost certainly have a three-pin “XLR” connection on the base.
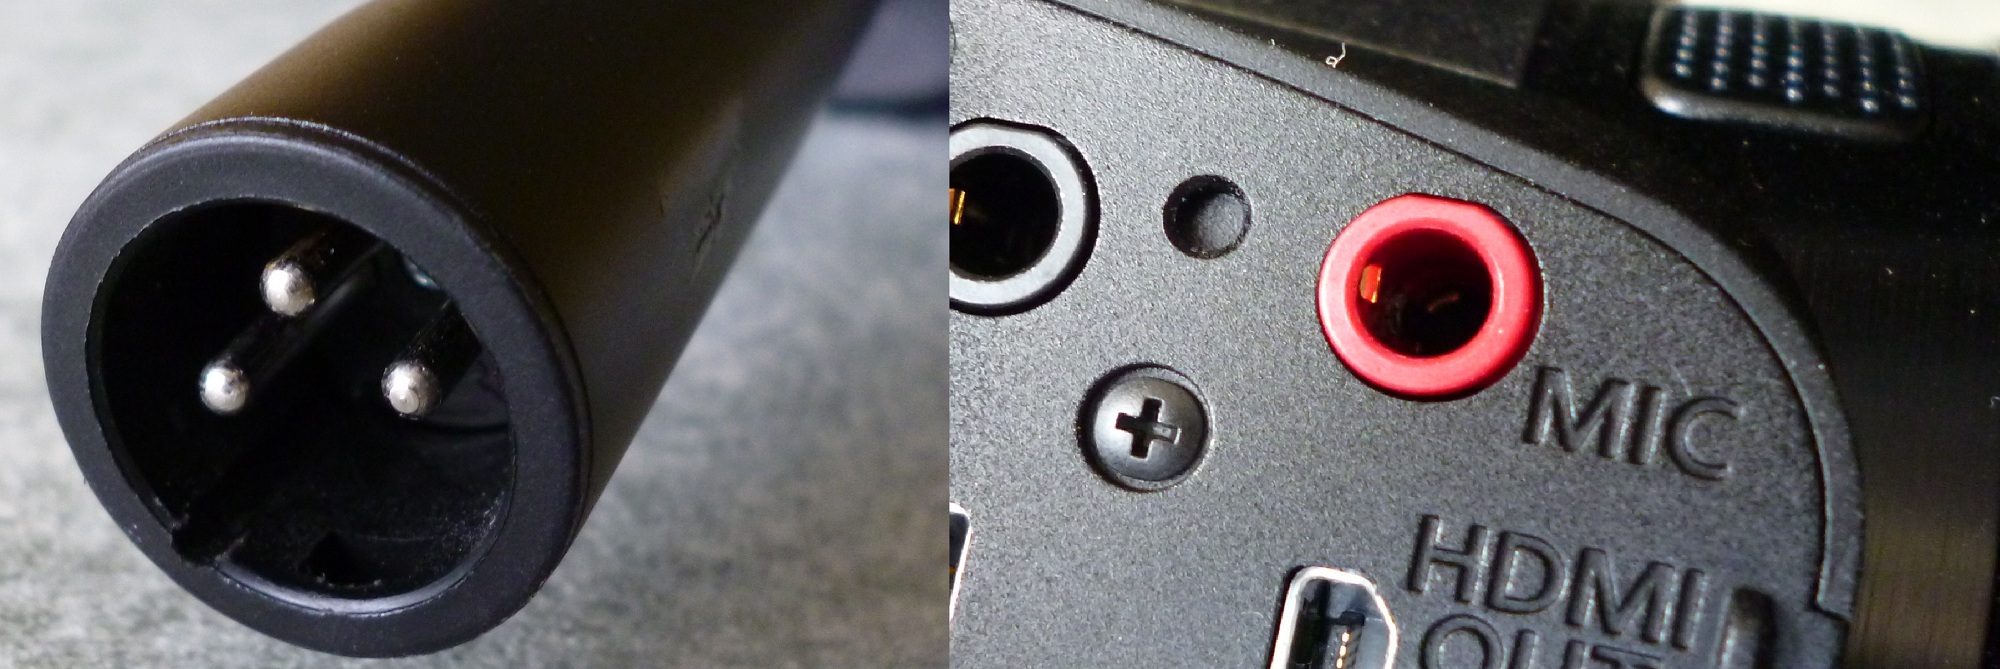
Obviously the two don’t match, and we have had several emails here at Tubeshooter about how to make the two work in harmony.
How not to fix it
Often, people will buy or wire up a cable with an XLR plug on one end and a 3.5mm jack on the other, plug the mike into the camcorder and then get problems with the sound and wonder why.
The thing is, pro XLR mics are mono and balanced. Consumer camcorders have stereo, unbalanced inputs. The two are simply not designed to be connected directly.
There’s a reason that an XLR plug doesn’t look like a 3.5mm jack and it’s not just to be awkward. It’s because the electrical signal coming out of the XLR is not what the camcorder expects to be plugged into it. They were designed for different purposes!
The stereo 3.5mm jack has three sections on it: a connector for the Left signal, one for the Right signal and one for a ground signal.
The XLR has three pins but – remember it’s mono, not stereo – uses two of the pins for the same signal, and the third for a ground. OK, “the same” is a little misleading – they’re actually slightly different but it’s not Left and Right as you get on the 3.5mm jack. It’s what’s called Balanced Mono.
The Technical Bit
We need to get slightly technical here to explain balancing. But any purists reading, take note, we will gloss over the finer details of impedance balancing and differential signals in order to make this simple.
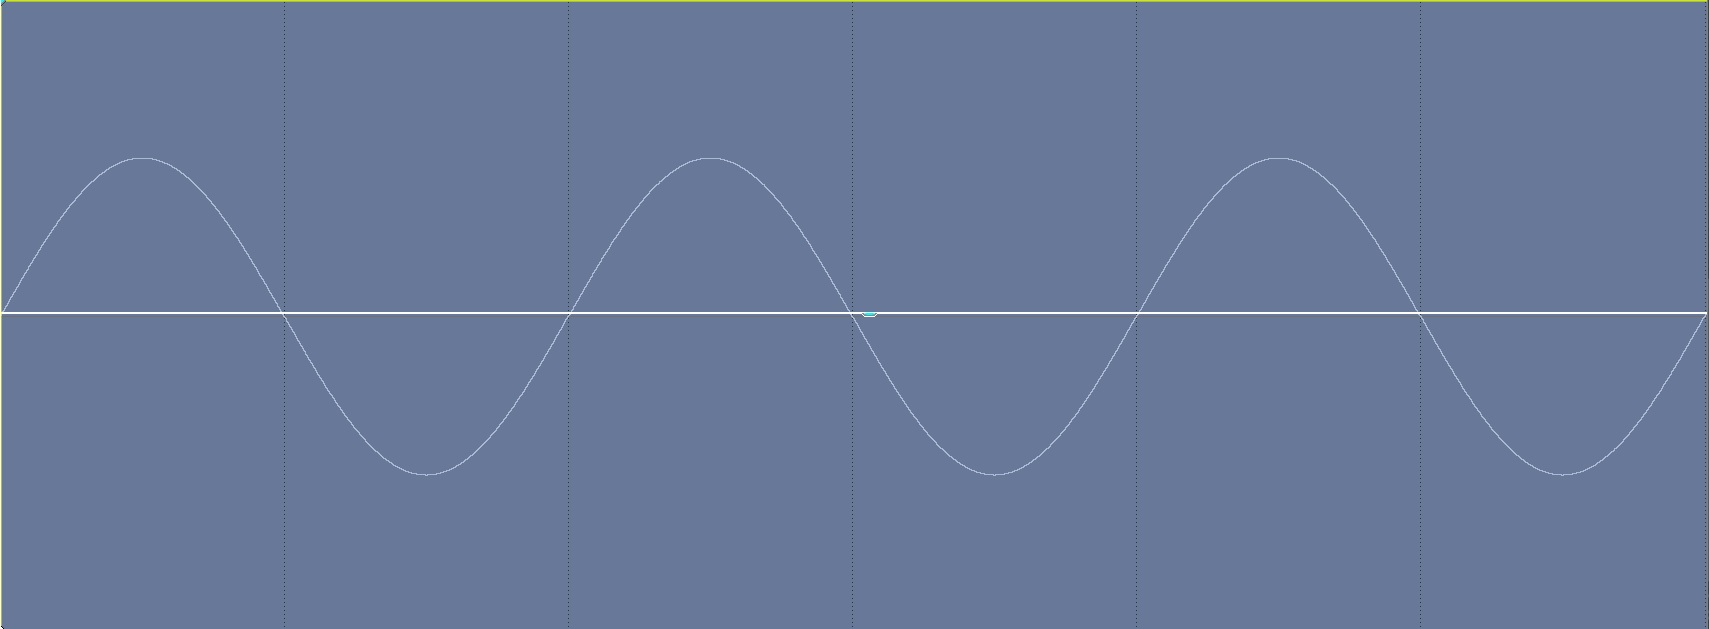
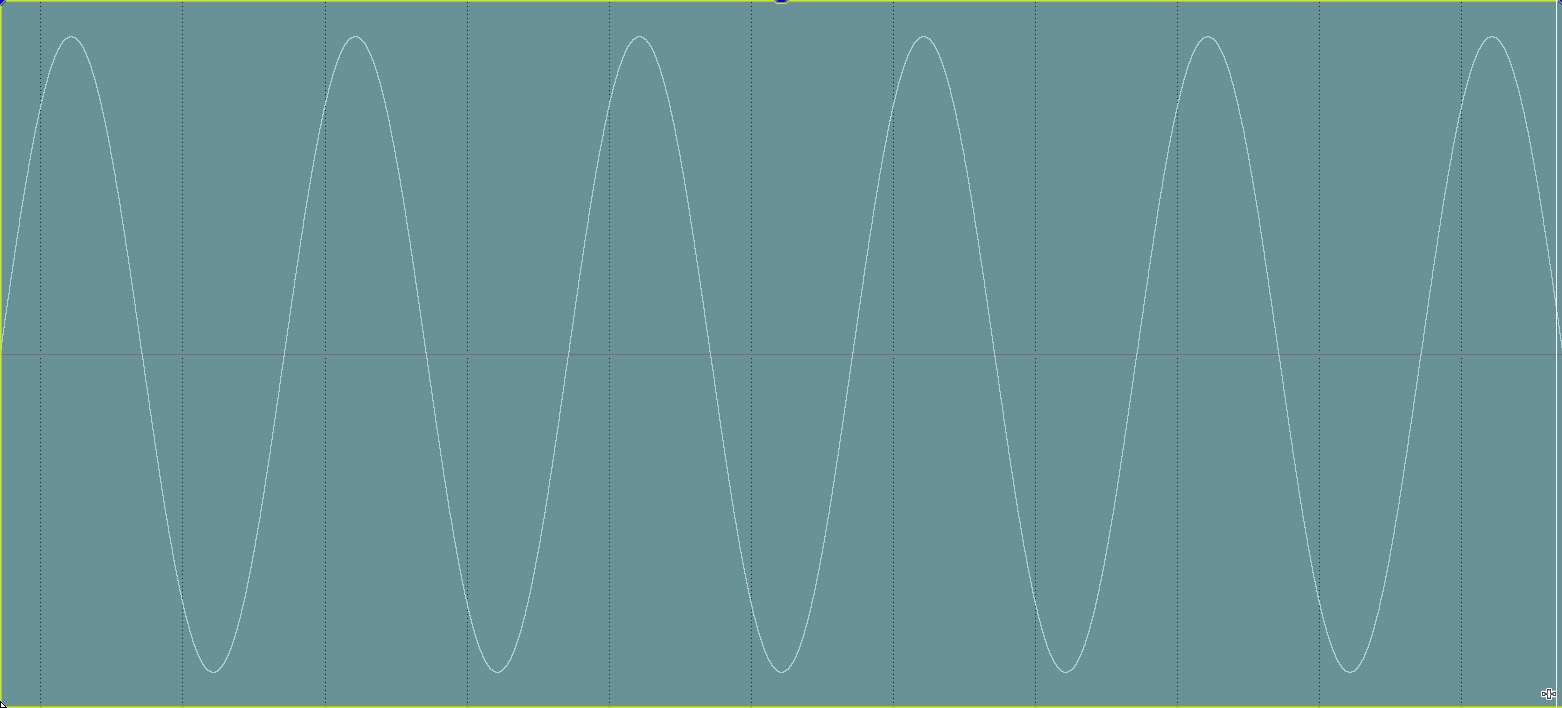
Here’s a simple example of what a sound wave looks like when drawn. Obviously they’re usually much more complicated but to make things easy, let’s use this:
Imagine that in the middle of recording this signal, some electrical interference is picked up by the microphone cable (it’s usually cables that pick up such noise because they’re long bits of wire and that means they act like an aerial so they pick up other electrical signals).
The interference would show up as a blip on the signal, like this (below). And it would sound like a glitch in the recording, a nasty click or pop:-

On an unbalanced connection like a consumer-grade camcorder, there’s nothing you can do about the glitch except try to edit it out afterwards.
To overcome this, clever people thought up “balancing”. This is how it works. What you do is send the same signal down two identical wires but you make one signal the mirror image of the original. This happens in the microphone, before it’s gone down the cable. Like this:-
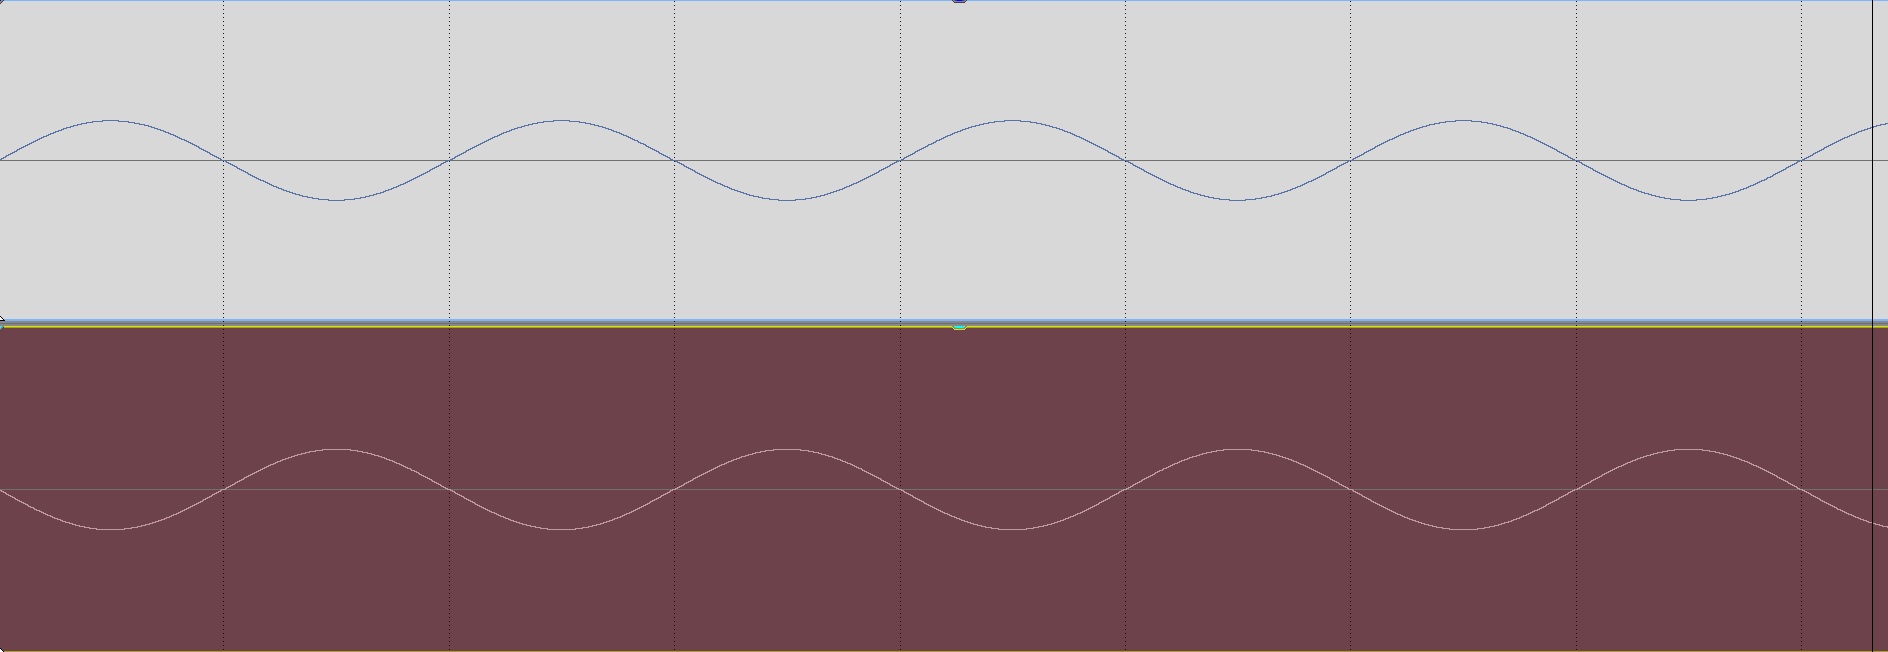
What this means is that when the cable picks up the interference, the glitch will be picked up on both channels the same way. Like this:-
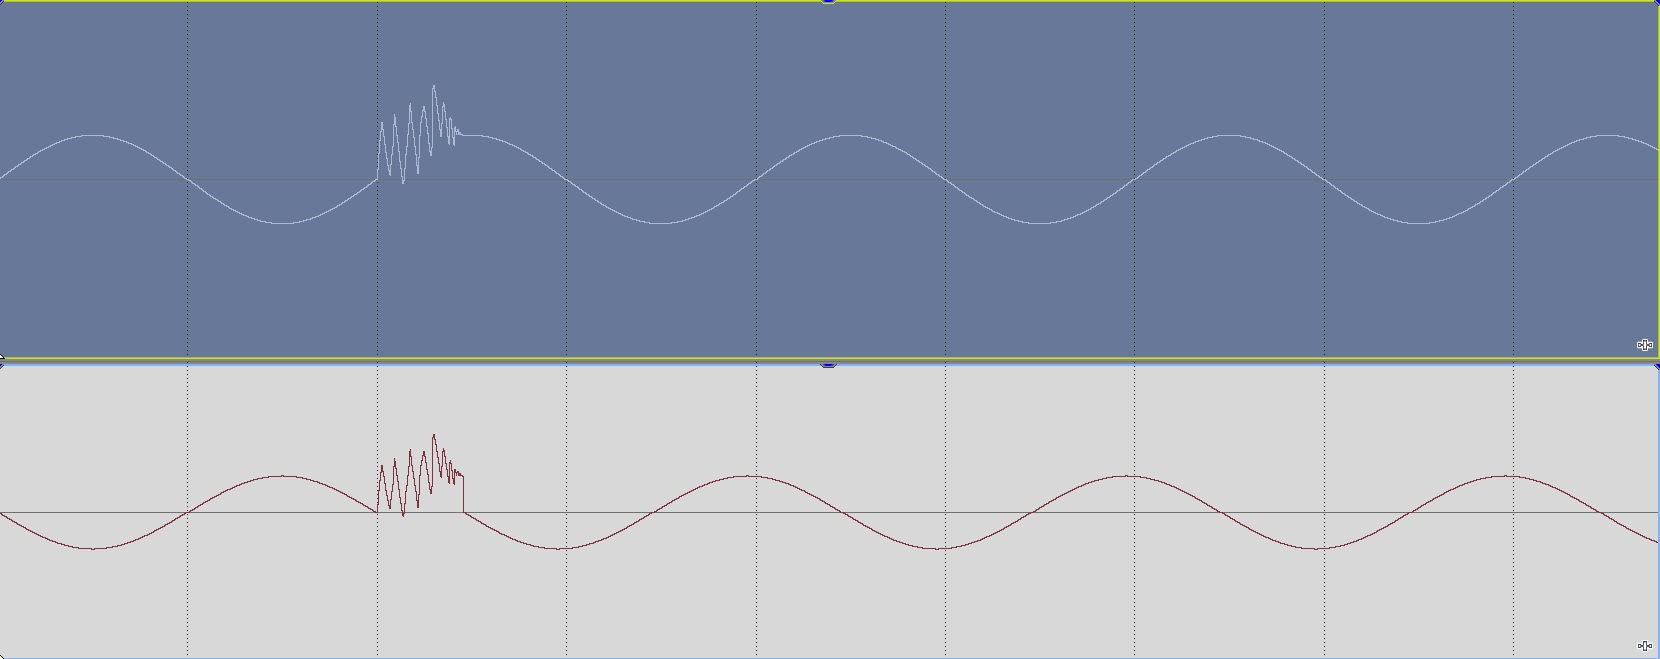
So, here’s the clever bit. At the end where you’re recording the sound, a device that’s designed to receive balanced signals takes the mirror image and flips it back so as not to be a mirror image again:

The key is, look what’s happened to the glitch. It’s now been turned upside down, whereas the two sound signals, which you want, match each other.
So now, you add the two signals together. This gives a BIG strong signal for the sound you want – but the two glitch recordings added together cancel each other out:-
This is the so-called “differential balancing” process. And it means any electrical glitches picked up by the cable effectively erase themselves from the recording. It’s simple, but clever and it works.
But – and this is important – balancing and the de-balancing happen in the microphone and in the camcorder. There’s nothing really special about a balanced cable as such, it’s just a bundle of wires. You’ve got to have both ends of the system capable of understanding balancing in order for it to work.
So why can’t my camcorder do this then?
You can see that if you plug a balanced signal into a camcorder that’s expecting just a Left, Right and Ground unbalanced signal, it doesn’t know do the mirror image cancellation, so it doesn’t! It just records one side of the mono signal thinking it’s the Left side of a stereo sound. And it records the flipped, mirror image side thinking it’s the Right side of a stereo sound.
When you play that back on your computer, in stereo, it might sound OK. But what you might also find is that the Left and Right – remember they’re mirror images of each other, they haven’t been unflipped – will cancel each other out – and you’ll wonder what’s happened to your sound.
The same happens, if you mix the recording down to mono. Left and Right will cancel each other out.
You may wonder why you would do that? Well, look at the iphone. It has mono loudspeakers so when someone with an iphone watches your video, if it was recorded using balanced mono sound into an unbalanced stereo camcorder, they won’t hear the sound or it’ll sound really tinny and muffled because the two mirror images zap each other.
Solutions
If you’ve already recorded sound like this, then it’s easy enough at the edit stage to fix it – just mute either the Left or the Right channel and pan the other one to the centre.
Yes, you’ve now got mono sound and yes, it’ll still have any interference that was picked up during recording. But it was mono to start with at the microphone so don’t worry about that – and it will be audible, which is good.
But it’s better if you don’t record the mirror images of the sound in the first place. The cheap and horrid way of doing this – which totally misses the whole benefit of a balanced microphone, which is avoiding glitches – is to make a cable that wires ONE of the L or R pins on the XLR cable, to BOTH of the L and R pins on the 3.5mm jack. The ground just goes to ground as usual. Whichever pin on the XLR you didn’t choose is just left unwired.
This will avoid the recorded sound cancelling itself out on playback. But having bought a balanced microphone, you probably want to make use of its power to cancel out noise, that’s the whole reason you buy one.
Let’s just be clear: you get NO benefit from balancing at all, unless both the microphone AND the recorder understand the balancing process. The mic and the cable alone do nothing without the camcorder accepting balanced signals.
So if your camcorder doesn’t have balanced XLR inputs then the best bet – it’s not costly – is to buy a little box that adds them, such as the ones from Beachtek or Juiced Link.
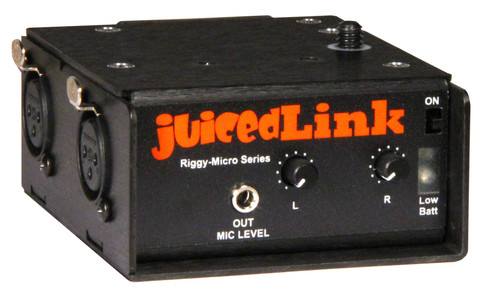
You attach the box to your camcorder, usually underneath. Plug the XLR cable in and the box converts the signal – doing the whole mirror-image noise reduction trick so you get the benefit – and sends it out on a normal stereo mini-jack to go into your camcorder. This means the only bit of cable liable to pick up any noise that’ll be recorded is this tiny connection.
And as you can see, the adapter has TWO sockets, because each one remember is mono, so you get one for Left and one for Right in your recorded stereo sound from two mono balanced mikes.
That’s it. Hopefully this will help sort your microphone dilemmas. Here’s our video on the topic:
Thanks! This has been a problem with our setup for a while. Now I understand why!
Just wanted to say a big Thank You for this article.. After having a lot of problems recording directly to a recording device from an XLR dynamic mic, there had been a lot of “clicking” and other unwanted noise on the recording, but with Audacity, splitting the stereo output, inverting one of the two tracks, then mixing them down, they cancelled out (as described beautifully in your article) the majority of the interference picked up from the cabling. FANTASTIC!!
Glad it helped! Was your recording device not also XLR equipped and balanced then? Lucky you saved the mic’s output as “stereo” when it’s mono of course, thus preserving the information with which to de-noise the sound.
Hi – need you help please
I have a Canon 70D camera – I wish to mount a Rode Mic on the Hot shoe and clip a Rode Laval mic to myself – I would like to connect the two so I can then plug the one jack into my Camera – is this possible – please do let me know – Many many thanks
thanks. This was an excellent, clear and sufficiently technical explanation to help understand this issue
Great. Glad it helped. Cheers.
Hi,
As a complete novice on video, your description above wa concise and very illuminating but left me confused slightly in one area …
You say:
“But it’s better if you don’t record the mirror images of the sound in the first place. The cheap and horrid way of doing this – which totally misses the whole benefit of a balanced microphone, which is avoiding glitches – is to make a cable that wires ONE of the L or R pins on the XLR cable, to BOTH of the L and R pins on the 3.5mm jack. The ground just goes to ground as usual. Whichever pin on the XLR you didn’t choose is just left unwired.”
How can you know which of the two wires from the XLR mic has the positive (ie not flipped) signal?
Or does it not matter?
Sorry for the delayed reply; it does not matter which side you record.
I want to thank you for this article. I have been jumping through all sorts of hoops trying to figure out why I had one channel on my videos that had a significant drop in output. I am amazed, when you purchase a product like a pro mic, that the salesman does not inform you of the necessity of some kind of device that will deal with XLR outputs; despite the fact that you tell them exactly what you are going to use it for. I shall be able to go forward with my projects. Thanks, again
Hello. I’m so glad it was useful. I see people having this issue all the time and there generally seems to be a lack of understanding as to what “balancing” audio means and what an XLR cable actually is! A lot of salespeople probably don’t know either, mores the pity :-( Cheers
Hi,
Nice article!
A couple of questions:
1) Why can’t one do the flip and merge in post?
2) The graphic of your normal and flipped waveforms seem to be slightly out of sync – I presume that was just an error and not a subtle point I’ve missed?
1. I presume that might be feasible but I have never tried. It seems like a bit of a bother and isn’t what the system was invented for which was to provide clean, quality audio directly into the recording device.
2. Not sure what you mean abou them being out of sync.